How to Add Meta Tags in WordPress: Manual vs. Plugin Methods
Meta tags play a significant role in improving your WordPress site’s search engine visibility and user experience. These HTML elements provide concise information about your web pages to search engines and potential visitors.
This guide will walk you through two methods of adding meta tags to your WordPress site: manually and using plugins. We’ll cover step-by-step instructions for both approaches, helping you choose the best option based on your technical skills and site requirements.
For those managing large WordPress sites, we’ll also introduce efficient ways to handle meta tags across multiple pages. By the end of this article, you’ll have the knowledge to implement and manage meta tags effectively, potentially improving your site’s search rankings and click-through rates.
Understanding meta tags in WordPress: A quick overview
Meta tags are HTML elements that provide information about a web page to search engines and website visitors. In WordPress, these tags can help optimize your site for search engines and improve user experience.
Common types of meta tags include:
- Title tags: Define the title of your web page in search engine results.
- Meta descriptions: Provide a brief summary of your page’s content.
- Meta keywords: List relevant keywords for your page (note: less important for SEO now).
While meta tags were once a primary ranking factor, their direct impact on search engine rankings has diminished. However, they still serve important purposes:
- Improving click-through rates by displaying relevant information in search results.
- Enhancing user experience by providing clear, concise page descriptions.
- Helping search engines understand your content’s context.
Google, for instance, may use the meta description tag to generate search result snippets, although it doesn’t use meta keywords for ranking. Other search engines might still consider these tags, so it’s worth implementing them as part of a comprehensive SEO strategy.
Step-by-step guide: Adding meta tags manually to WordPress
For those managing a small WordPress website and know the basics of HTML, here’s how to manually add meta tags to your site:
Access your WordPress files:
Use a secure file transfer protocol (SFTP) client to connect to your server.
Navigate to your theme directory (usually wp-content/themes/your-theme-name/).Locate and open the header.php file:
This file controls the <head> section of your WordPress pages.
Find the opening <head> tag in header.php.
Add your meta tags:
Insert your desired meta tags immediately after the <head> tag.
For example, to add a description tag:<meta name="description" content="Your site description here" />To add a keywords tag:
<meta name="keywords" content="keyword1, keyword2, keyword3" />Save the file and upload it back to your server.
Check your site to ensure the tags are working correctly.
While this method is straightforward for adding generic meta tags to your entire site, it has limitations:
- It applies the same meta tags to all pages.
- Updating tags requires repeated editing of the header.php file.
- It doesn’t allow for easy customization of meta tags for individual posts or pages.
For more flexibility in managing meta tags, especially for individual posts and pages, using a WordPress plugin is often a more efficient approach. We’ll explore this method in the next section.
Simplifying meta tag management with WordPress plugins
For most WordPress users, especially those managing multiple posts and pages, plugins offer the most efficient way to handle meta tags. They provide a user-friendly interface and allow for customization of meta tags for individual pieces of content.
One of the most popular options is Yoast SEO. Here’s how to use it to add meta tags:
To add meta tags to a specific post or page:
Open the post/page editor.
Scroll down to the Yoast SEO section below the content editor.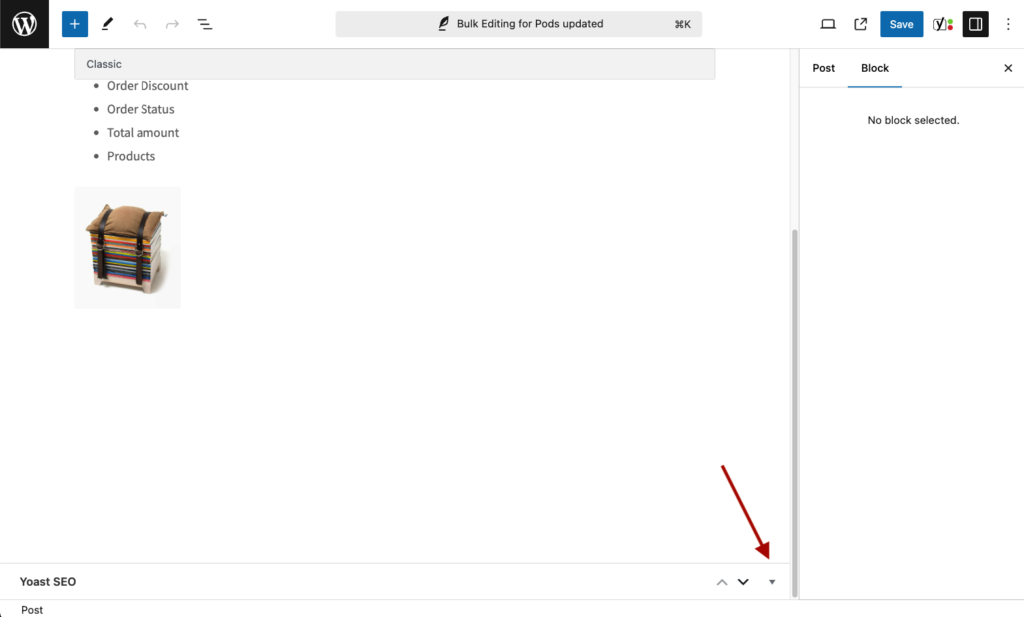
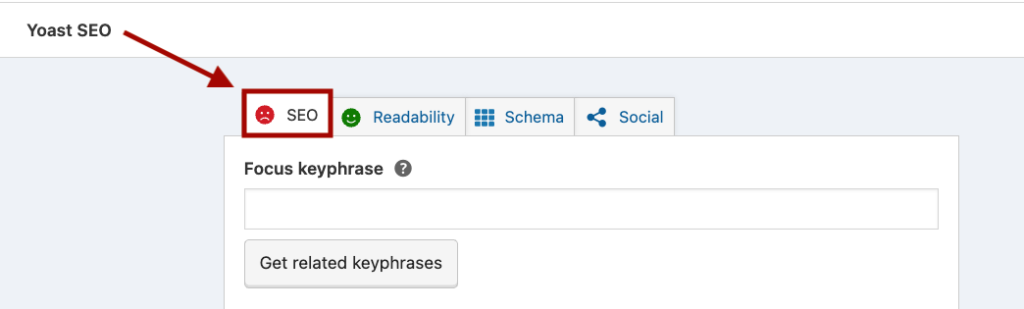
Click on the “SEO” tab.
Enter your preferred SEO title and your meta description. Make sure it looks good in both desktop and mobile.
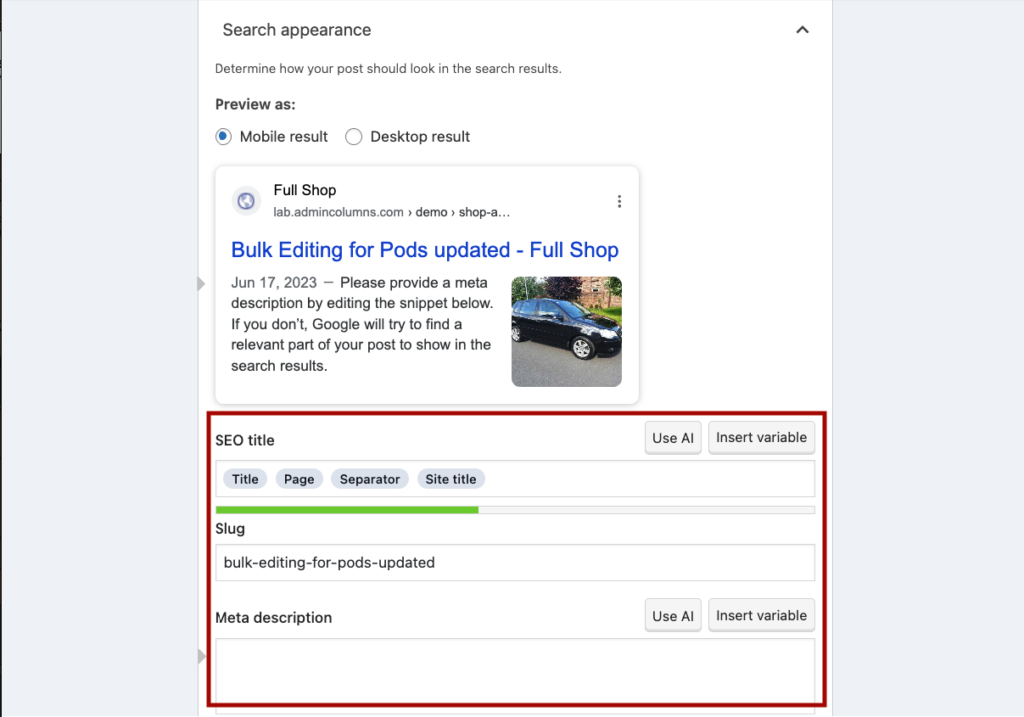
Yoast will automatically generate these tags in your page’s HTML.
To set default meta tags for your homepage:
Go to the Homepage and scroll down to the Yoast SEO tab.
Fill in the “Homepage title” and “Homepage meta description” fields.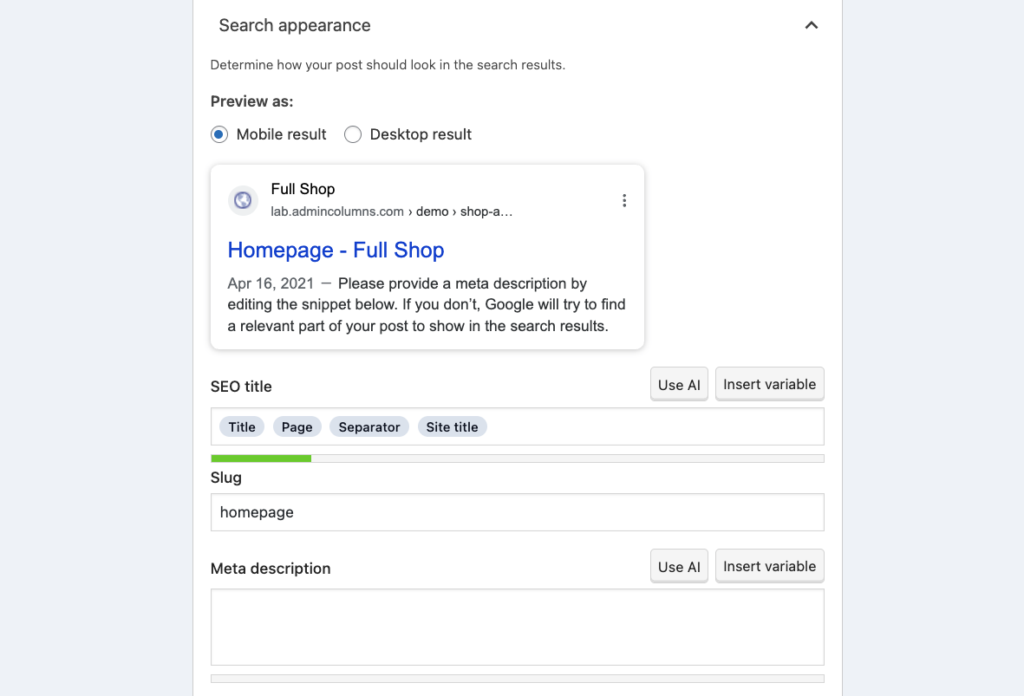
While Yoast SEO is powerful, it can become time-consuming to manage meta tags for large websites. You’d need to edit each post or page individually, which isn’t ideal for sites with extensive content.
For more efficient management of meta tags across multiple posts and pages, you might want to consider a solution that allows for bulk editing and provides an overview of your meta tags. This is where a plugin like Admin Columns can be particularly useful, especially when combined with Yoast SEO.
Streamlining SEO: Editing meta tags with Admin Columns
For WordPress sites with extensive content, managing meta tags can become a time-consuming task. This is where Admin Columns shines, offering powerful features to streamline your SEO workflow.
Admin Columns is a WordPress plugin that enhances your admin area, allowing you to customize list tables and manage your content more efficiently. Here’s how it can help with meta tag management:
SEO column integration: Admin Columns has built-in integration with Yoast SEO, enabling you to display SEO meta fields as columns in your WordPress admin interface.
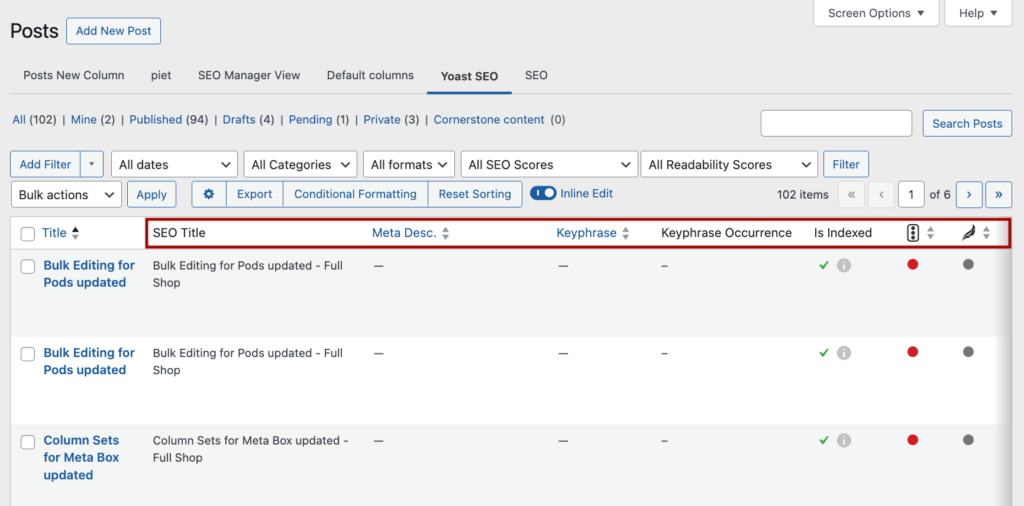
Custom table views: Create separate table views for different data sets and add as many Yoast SEO fields as you need. For example, you can set up a view specifically for SEO metadata.
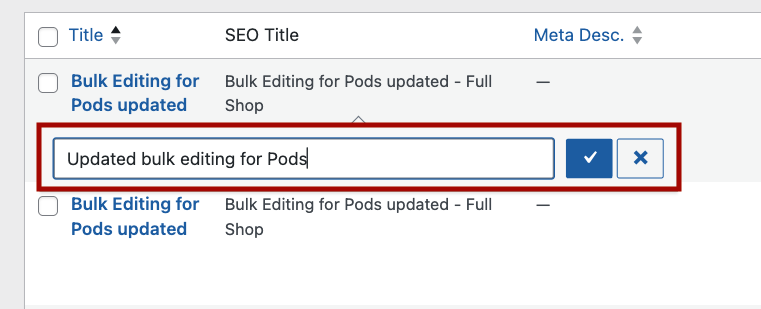
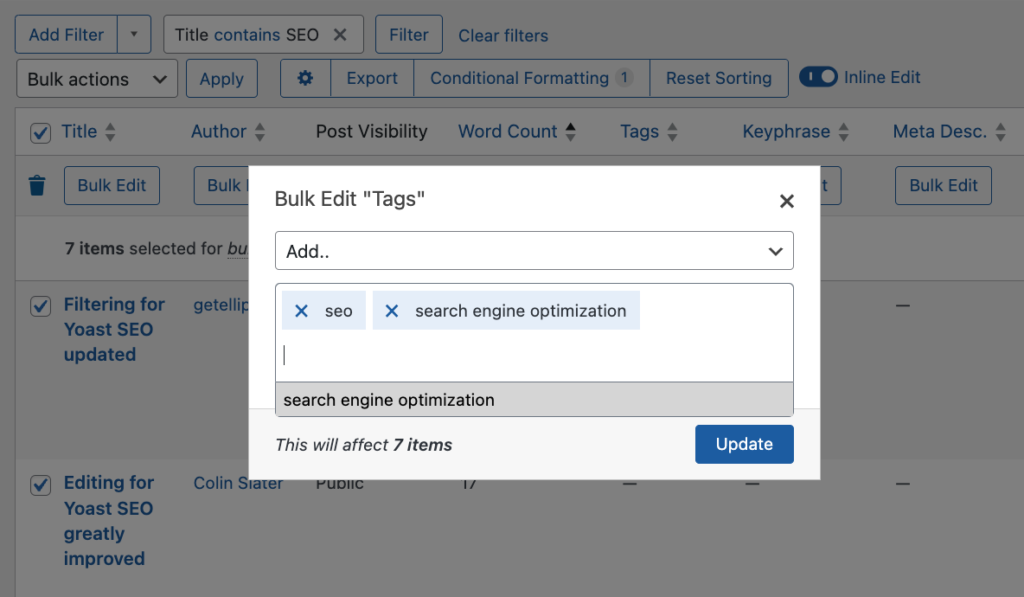
Inline and bulk editing: Edit SEO titles and meta descriptions directly from the posts overview or use bulk editing to update meta tags for multiple posts at once.
Smart filtering: Apply filters to quickly find posts needing SEO improvements and combine them as you need for more precise content management.

Export functionality: Easily export your SEO data to CSV for analysis or reporting.

To get started with Admin Columns for SEO management:
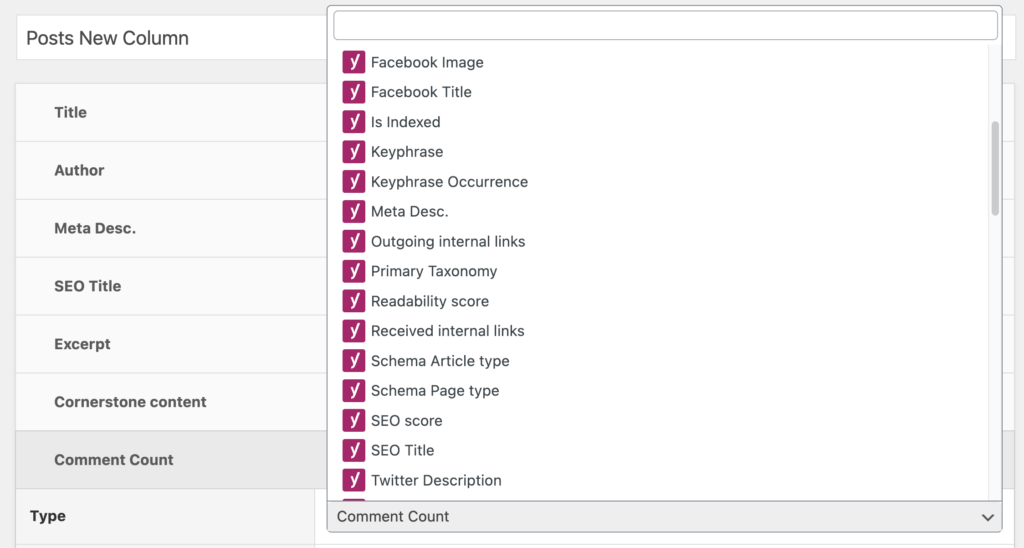
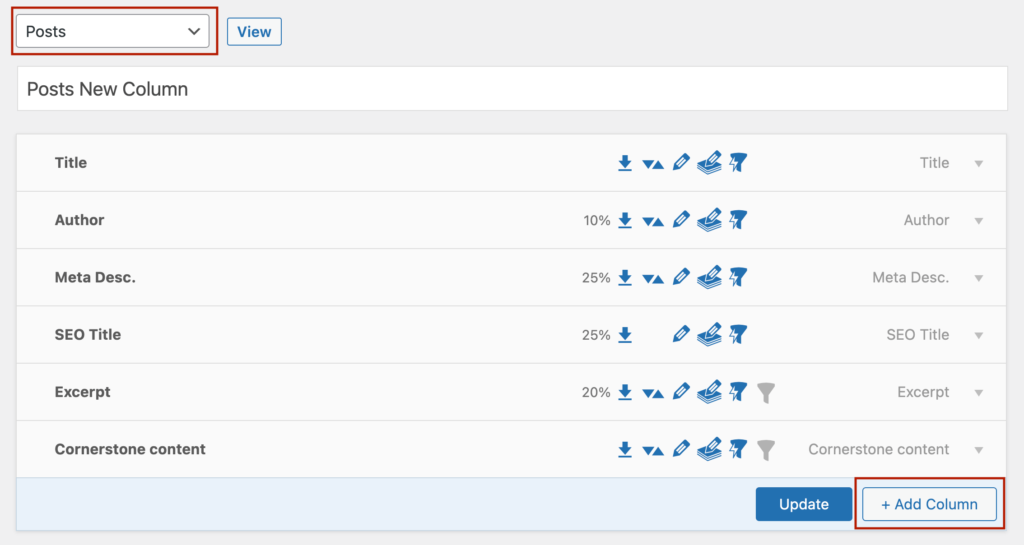
Go to the list table for your posts or pages and click Edit Columns.
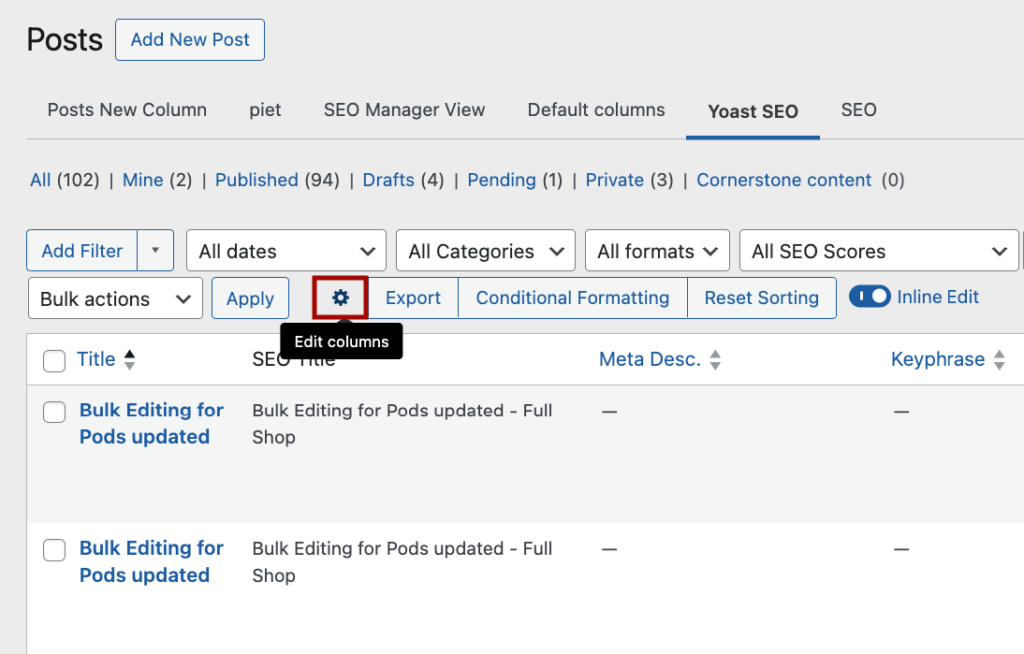
Click on + Add Column to add Yoast SEO fields to your table view.
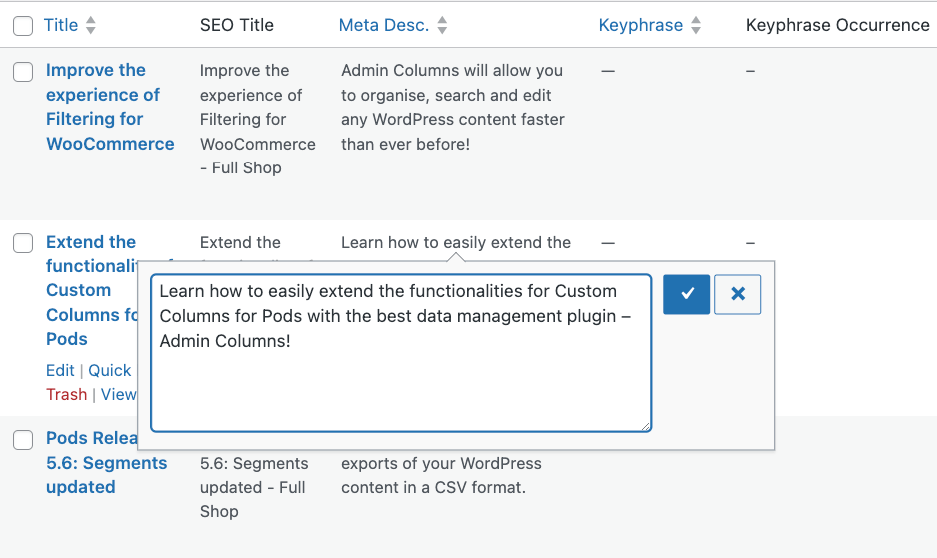
Use the inline editing feature to quickly update individual meta tags.
For bulk updates, select multiple items and use the bulk edit option. For example, you could filter all articles that contain a specific keyword or phrase in their titles and then bulk add relevant tags, helping users find the content they need faster.
Admin Columns has been tested on databases with over 1,000,000 records, making it suitable for websites of all sizes. By combining smart filtering with bulk editing, you can efficiently manage SEO metadata across your entire site, saving time and ensuring consistency in your optimization efforts.
Optimize your WordPress site’s SEO today
Meta tags play a crucial role in optimizing your WordPress site for search engines and improving user experience. While you can add meta tags manually by editing your theme files, using plugins offers a more flexible and user-friendly approach, especially for non-technical users and sites with lots of content.
Here’s a quick recap of your options:
- Manual method: Suitable for small sites or those comfortable with code, but limited in flexibility.
- SEO plugins like Yoast: Offer an easy way to add and customize meta tags for individual posts and pages.
- Admin Columns: Provides advanced management capabilities for sites with extensive content, allowing for efficient bulk editing and filtering of SEO metadata.
Remember, while meta tags are important, they’re just one part of a comprehensive SEO strategy.
For those managing large WordPress sites or looking to streamline their SEO workflow, Admin Columns offers powerful tools to take control of your meta tags. With features like custom table views, smart filtering, and bulk editing, you can manage your SEO metadata more efficiently than ever before.
Ready to take your WordPress SEO to the next level? Try Admin Columns today and experience the difference in managing your site’s meta tags and overall content structure.
Get Admin Columns Pro
Effortlessly sort, filter, edit, export, and organize content in the WordPress admin.
